
I use a Strymon Magneto delay unit and recently had need to trigger it from across the room. It uses a CV input that looks for ± 5V to cycle through it’s loop record start, stop, and reset functions. I ended up building a remote trigger from purchased parts that was inexpensive, easy to build, and worked great. So, in case you find yourself in a similar situation, here is my solution.
What you’ll need:
(1) tap tempo box (NO, or “normally open”). You can get these for less than $20. I wanted a metal unit so bought a used MXR version for $30. It’s built like a tank and should last forever.
(1) guitar cable you don’t mind dedicating to the project. Any cheap one will do.
(1) shortish eurorack patch cable you also don’t mind dedicating to the project.
Soldering iron.
Voltmeter.
Any eurorack module that outputs a DC voltage. I used one of the attenuverters that is part of Make Noise Maths.

How to build:
Cut the jack off one end of the guitar cable and strip/expose the wires. Cut the eurorack patch cable in half and strip/expose the wires.

You’re essentially making a regular patch cord, but with a momentary switch spliced in the middle of it. And that switch is at the end of a long cable which means that you can place it wherever you need. Tap the switch and it will allow the voltage to get from the attenuverter output to whatever module input you need to trigger (in my case, the tap function on the Magneto). Using your voltmeter, check the eurorack patch cables to see which wires correspond to the jacks’ tip and sleeve (TS), then wire the cables together as follows:
Eurorack cable #1 tip (T) -> One side of the 1/4” cable
Eurorack cable #2 tip (T) -> The other side of the 1/4” cable
Eurorack cable sleeves (S) -> To each other
If your eurorack cables have a third wire, you can solder them both to the shield wire of the guitar cable. If not, you can cut off the shield that’s exposed at the end of the guitar cable.
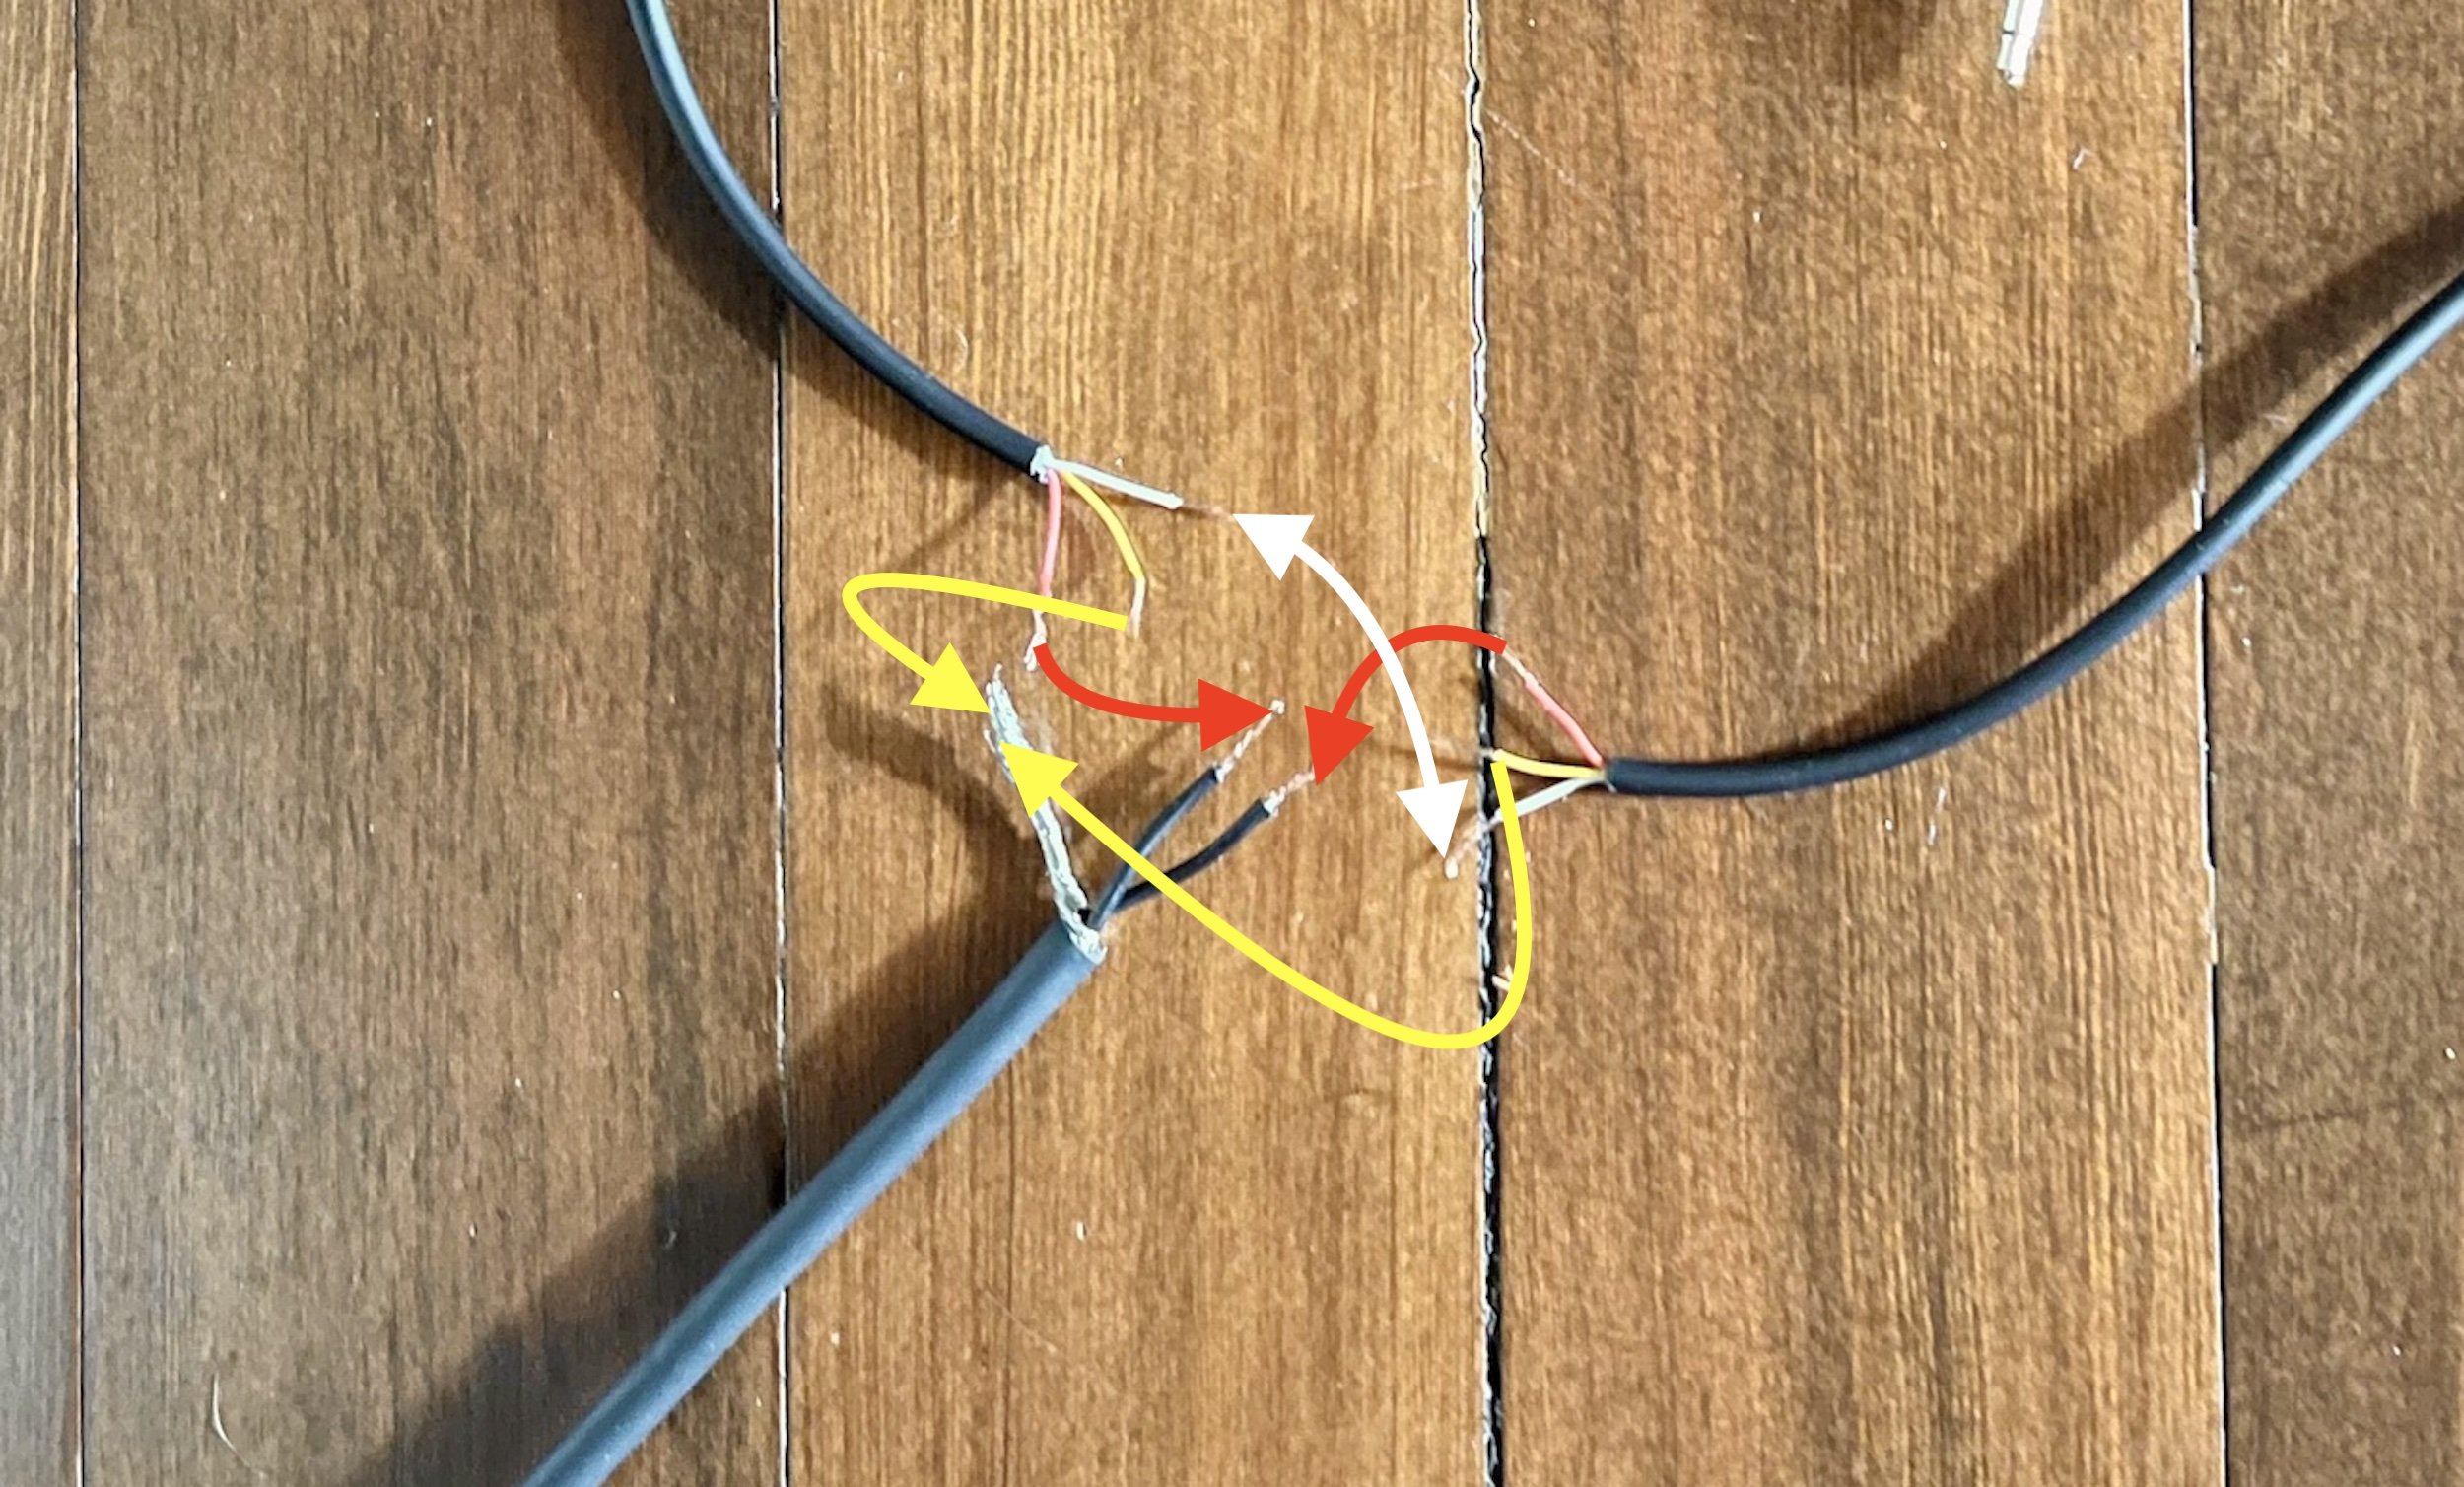
In this photo, red is the tip (T), white is the sleeve (S), and yellow is the common/ground.
Tape or heat shrink the connections so they don’t short.

To use, plug either eurorack jack into the attenuverter (or other voltage supply module) and the other eurorack jack into your voltage input jack. That’s it!